
Photo provided by Homegrown Cannabis Co.

Audio By Carbonatix
This content is sponsored by Homegrown Cannabis Co.
Even for experienced cannabis connoisseurs, the idea of growing your flower can be daunting, but it doesn’t have to be. Anyone can grow cannabis, and you don’t need to break the bank to get started.
Much more than just a place to buy high-quality cannabis seeds, Homegrown Cannabis Co., based in Fort Lauderdale, Florida, is committed to making at-home growing more accessible and less intimidating.
“At the most basic, you just need dirt, water, light, and nutrients,” says Parker Curtis, one of Homegrown’s grow experts. “Some of these people list off things that you need, and before you know it, you’re at $10,000. But I didn’t, and I still don’t have a lot of that, and I’m growing just fine. A lot of people probably have most of the supplies that they’d need just lying around the house.”
Homegrown lays out all of your growing options so you can decide what setup is the best fit. All you have to do is follow their lead.
Start with Quality Cannabis Seeds
All of Homegrown’s premium seeds come with a detailed storage and germination guide and are backed by their germination guarantee. Any seeds purchased from Homegrown will germinate in 120 days or less as long as you follow their guidelines, and Homegrown will compensate customers for any seeds that don’t germinate under these conditions.
If a seed doesn’t germinate after following Homegrown’s proven guidelines, they’ll replace it – no guesswork, no worries.
Top germination methods include the paper towel method, the water soaking method and the direct soil method. Ideal germination conditions are a temperature of 70-80 degrees, humidity at 70-90 percent, and darkness and moisture without overwatering.

Homegrown Cannabis Co. offers a germination guarantee that covers all of their premium seeds.
Photo provided by Homegrown Cannabis Co.
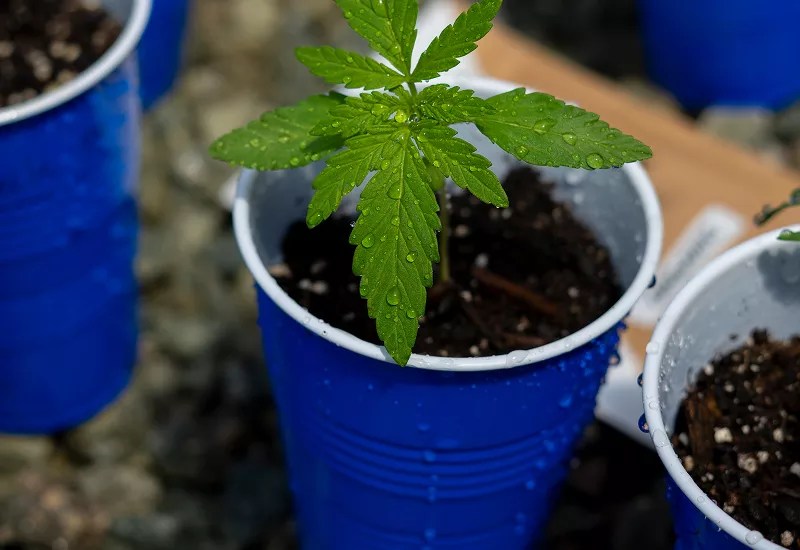
When transplanting germinated seeds, handle the seeds carefully, place them taproot-down into moist soil, and support early growth gently. Avoid common germination mistakes such as overwatering (soggy conditions can rot seeds), using old or mishandled seeds, letting seeds dry out after they’ve started germinating, handling seeds roughly, or planting them incorrectly.
Choosing the Right Cannabis Strain for Colorado’s Environment
Especially with beginners, it’s common to make the decision primarily based on the type and size of their grow setup, but Curtis recommends they start by deciding what they want to get out of the flower.
“First of all, select for what you want from the effects of it,” he says. “Do you want a highly medicinal strain, or heavy sedating effects, or something that’s a bit more uplifting, or something CBD-dominant?”
For example, Curtis tells us Colorado growers are usually steered towards indica or indica-dominant hybrids with shorter flowering periods because of the dry climate and high elevation here, but they’re not necessarily limited to those strains.
“You’d end up kind of boxing people in,” Curtis says. “You get customers out there that say, ‘Well I want sativa and the uplifting high, are you telling me that I can’t grow that?’ So there are some caveats worth explaining with that.”
Homegrown’s online Find Your Strain quiz helps growers figure out the perfect match based on personal needs and environment. There are many key elements of each strain to consider like terpenes, phytocannabinoids, and flavonoids, so don’t get too caught up searching for the highest percentage of THC.
Nutrient and Fertilizer Management
Feeding your plant the right nutrients at the right time makes a huge difference in its health, size, and potency. Cannabis plants need three main macronutrients throughout their life: nitrogen, phosphorus, and potassium. Each one plays a different role. Nitrogen, which is essential for leafy growth, is most important during the vegetative stage. Phosphorus fuels root development and flower formation, while potassium supports the plant’s overall health and quality of flower.
You can use organic fertilizers, like compost teas or worm castings, which release nutrients slowly to enrich the soil. Synthetic fertilizers provide quicker results, but require more careful dosing to avoid nutrient burn, so choose the best option for your grow style and setup.
Cannabis plants require different nutrients during different stages of their life cycles.
Photo provided by Homegrown Cannabis Co.
What and how to feed your plant depends on its current stage. Seedlings require very light feeding, if any at all, so Homegrown recommends starting with water and allowing the plant to settle. Once the plant enters the vegetative phase, you’ll need to feed it nutrients high in nitrogen once or twice a week, depending on the plant size and soil quality. During the flowering stage, switch to bloom nutrients, which are lower in nitrogen and higher in phosphorus and potassium.
Bloom nutrients will help you achieve dense bud production and strong terpene profiles. Keep the pH level of your water and soil between 5.8 and 6.5 to ensure your plant can absorb nutrients properly, because even the best nutrients won’t work if the pH is off balance. Two weeks before harvest, stop feeding and flush your plants with plain water to clear out excess nutrients and improve flavor and smoke quality.
There are several common issues newer growers should watch out for, but luckily they have simple solutions. Yellowing leaves most likely indicate a nitrogen deficiency, so increase the nitrogen in your plants’ nutrients. However, if you’re noticing burnt tips, you may be overdoing the nutrients. Stunted growth or dark green, clawed leaves can mean that your plant is not absorbing nutrients, or that there’s a pH issue with your soil or water. If you’re ever unsure, remember that less is more. It’s easier to correct underfeeding than to fix overfeeding.
Harvesting, Drying, and Curing
Once your plant has gone through its flowering phase, it’s time for the final and most rewarding steps: harvest, dry, and cure. Look for signs that your plant is ready for harvest. Pistils will darken from white to orange or brown, and trichomes (the crystal-like resin glands) turn cloudy or amber when it’s time. You can use a magnifying glass or jeweler’s loupe to check trichome color.
When you begin harvesting, cut your plant into smaller branches to make drying easier, and handle them gently to protect the trichomes. Remove large fan leaves if you prefer a cleaner dry. Then, hang the branches upside down in a cool, dark room with airflow, keeping humidity around 45 to 55 percent and temperatures between 60 and 70 degrees. Drying usually takes 7 to 14 days, but you’ll know it’s done when small stems snap instead of bending.
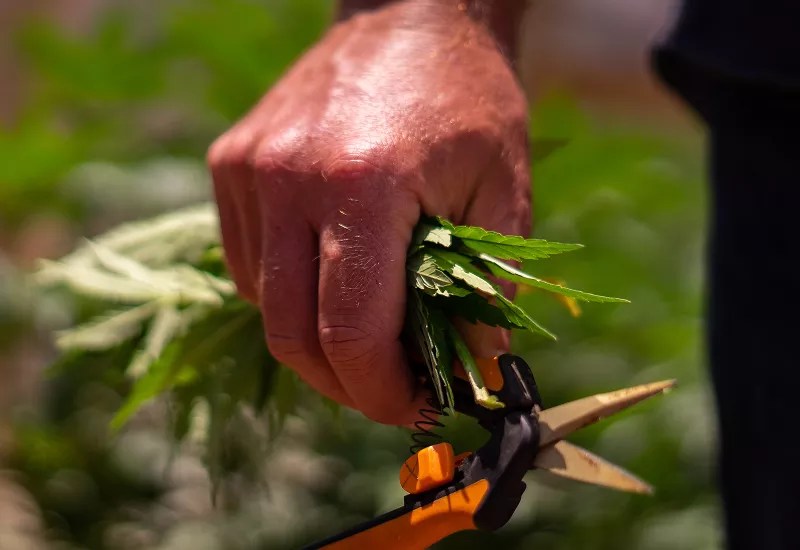
Cutting your cannabis plant into smaller branches will help with the drying process.
Photo provided by Homegrown Cannabis Co.
Properly curing your dried flower is essential preserving its quality. Once dried, place your trimmed buds into glass jars or specialized curing bags like Grove Bags. Traditional curing in jars involves storing buds in a dark cabinet and “burping” (opening) daily for the first couple of weeks to release moisture and refresh the air. This process can take 2 to 4 weeks and significantly improves flavor, smoothness, and potency.
If you’re using Grove Bags, the process is even easier. These bags are designed to maintain the perfect humidity range while allowing excess moisture and gases to escape automatically, eliminating the need to burp jars. They also help preserve terpenes and cannabinoids long term. Whichever method you choose, patience here pays off. Rushed or skipped curing often results in harsh smoke and diminished quality.
Finding Reliable Cannabis Growing Resources
For many seed banks, customer relations begin and end with supplying seeds, leaving you to fend for yourself when questions or concerns arise. But with Homegrown’s level of customer service, experts like Curtis are on call throughout the process, empowering home growers of all different experience levels.
Thankfully, the early days of combing the dark web, sorting through contradicting tips, or talking in code to get answers about growing weed are long gone.
“Back when I started, there were just forums that you would read,” Curtis says. “You would research a topic, and it would just be 100 different people giving their opinions. You can drown in all that information.”
Instead of falling into a rabbit hole, you can get all the information, supplies, and support that you need from one trusted source with Homegrown. Their website has easily accessible, free educational content, such as beginner grow guides, growing tips, Q&As with grow experts, and DIY solutions for home growers.
New episodes of grow expert Kyle Kushman’s “potcast” titled “Grow Weed at Home With Kyle Kushman” drop every week, and the Homegrown YouTube channel boasts over 600 video tutorials. If you’re still stuck, you can always reach out to one of their experts for personalized advice.
“There are going to be some challenges, but we’re here to support,” Curtis says. “We do a lot of customer outreach. So instead of just buying your seeds and figuring it out, we’re here. I’ll video chat with people, I’ll answer questions, and they’ll show off their grows. We incorporate some of their questions into our content, so we’re there every step of the way to help people along.”
Best Advice for New Growers
Homegrown’s best advice to new growers is simple: just get some seeds in the ground (or a bucket, or whatever you’ve got on hand). With time, you’ll be able to read your plant like a book, so don’t worry about getting it perfect the first time.
“If you start out painting or sketching, and you see this artist with this beautiful painting, it can almost be discouraging in a way,” Curtis says. “You might crumple up your sketches and go, ‘Oh my gosh, mine will never be that good. It can discourage you from getting the ball rolling. If you’re waiting for that perfect time, or waiting until you have every little piece of equipment, it’s much better to just start.”
If you’ve ever been curious about growing your own weed, here’s your sign to get going and get growing.